How To Use My Fuel Tax Software for IFTA Reporting
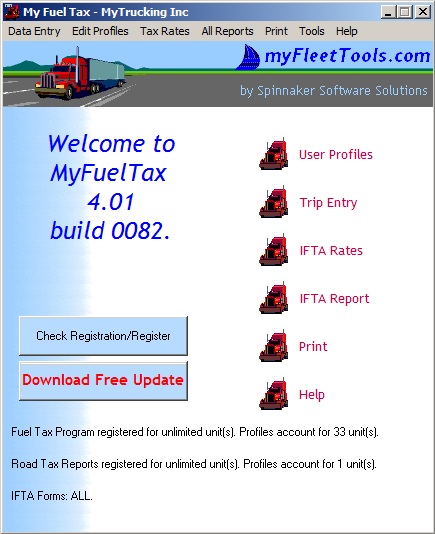
![]() When you click on this Icon on your desktop the program will be activated presenting you with the Welcome to MyFuelTax dialog.
When you click on this Icon on your desktop the program will be activated presenting you with the Welcome to MyFuelTax dialog.
From this dialog you can access all the features of our fuel tax software: All features of the program can be accessed using the menu bar, but besides the menu bar, the My Fuel Tax dialog displays six buttons which take you through all the IFTA related forms in the program. In the bottom of this form you can read which licenses are applicable for the version of the IFTA software installed on your computer.
The 'User Profile'
button of the My Fuel Tax dialog takes you to the “User Profile” Dialog where the user identifies the customer or customers and their units for whom Fuel Tax data will be recorded and reports will be generated.

The “New User Profile” -button allows you to enter the name of a new user, which will then be included in the “Select a User” dropdown list. Once the new user is selected you can then enter the other user information needed for the IFTA report; Address, SS#, FEID#, IFTA Account#, etc. The entry in the Country Field determines whether the reports for this user will be generated in mpg and US dollars, or in kpl and Canadian dollars.
The “Delete” -button will, after confirmation, delete the selected User Profile and all associated trucks from the profiles.
The “Add/Edit Units” -button activates the “Add/Edit Units” dialog and lets you add a new unit or edit an existing unit.
For most users entering the fuel type and maybe a quick note besides the unit ID is all there is to this dialog.
If you also use the Road Tax Reports, you will enter the profiles necessary for the Road Tax Reports as well. Any Unit for which an entry is made will be counted as a unit for the Road Tax license. Please Click on one of these links to read more about: Kentucky Weight Distance Tax | New Mexico Weight Distance Tax | New York Highway Use Taxes | Oregon Highway Use Taxes
The 'IFTA Rates'
button of the My Fuel Tax dialog opens the “Edit Tax Rates Dialog” where you can download the current IFTA rates from the IFTA website or manually enter or edit rates as needed.
Create an IFTA rates file for the desired quarter
Usually the latest quarterly IFTA tax rates are already available in your latest free update that you can download from our web site, but if that is not the case, you can collect the IFTA rates from www.iftach.org directly from My Fuel Tax.
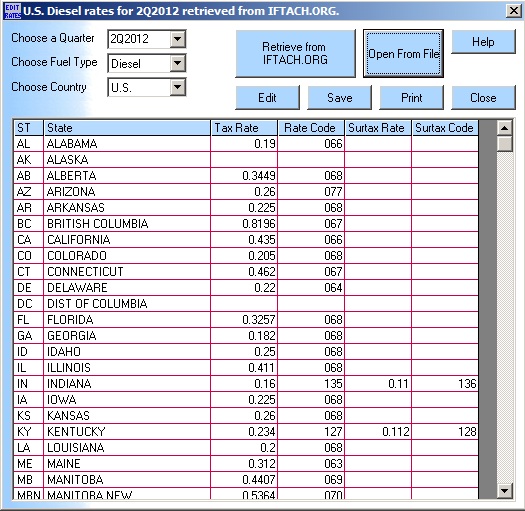
In the “Choose Quarter” combo box you select the IFTA quarter for which you will retrieve tax rates.
In the “Choose Fuel Type” combo box you can select either diesel or gasoline and the program will retrieve the appropriate rates.
In the “Choose Country” combo box you may select US or Canada as the country of origin.
The “Retrieve” – button loads IFTA rates from the IFTACH.org website based on your entries in the three combo boxes to the left.
The “Open from File” – button will open a saved IFTA tax rate file from the directory where it was saved.
The “Edit” -button allows you to edit rates manually as needed.
The “Save” – button saves a rate table to disk for future use. It can then be opened using the “Open from File” button.
The “Close” -button closes the IFTA Rates Dialog. If you have unsaved changes you will be prompted to Save.
The 'Trip Entry'
button of the My Fuel Tax dialog opens the “Trip Entry” Dialog where you enter odometer readings, distances in state, and/or fuel purchases.
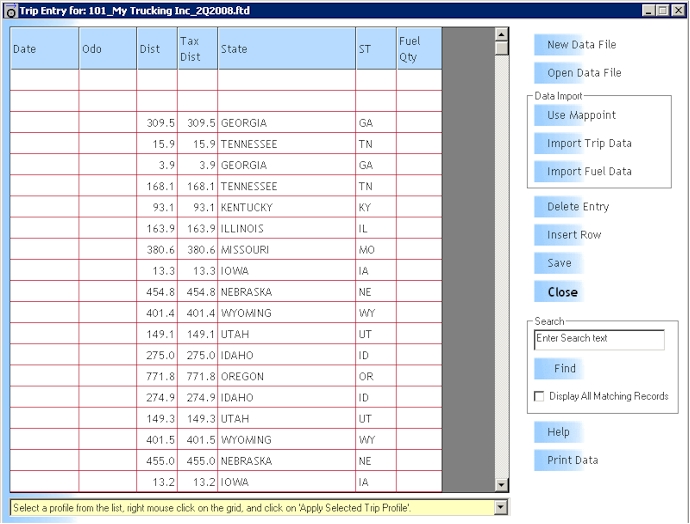
The “New Data File” – button (Shortcut key is Alt-N) opens the “Create New Data File for:” dialog. This dialog will ask you to select a User Profile, Unit, and Quarter. With this information it will then open a new data file for a new user or a new unit or a new quarter.
The “Open Data File” – button (Shortcut key is Alt-O) allows you to choose an existing data file to edit.
The “Import Trip Data” -button (Shortcut key is Alt-I) will import PC*MILER data files or distance and fuel data from our custom Excel file format.
The “Import Fuel Data” -button will import Comdata and Imperial Esso fuel data files.
The “Save” -button (Shortcut key is Alt-S) will save the current trip entry data into a file labeled with the current quarter and year.
The “Delete Entry” -button (Shortcut key is Alt-D) will delete your current entry. The “Insert Row” -button inserts a new data row above the currently selected row so you can add data in the middle of the file.
The “Find” -button (Shortcut key is Alt-F) activates the My Fuel Tax search feature. It will search the current data file for the search string of your choice and will highlight the findings for you. Note: The search is Case Sensitive. Now if you check the “Display Only Matching Records” box below the program hides all data which does not match your criteria. If you then click anywhere in the Header Row, or the right margin of the data grid, all your data becomes visible again.
The “Help” -button (Shortcut key is Alt-H) will activate Help Tour beginning with Help for the Data Entry Dialog.
The “Data Grid” of the Data Entry Dialog is a very dynamic object. After you open a data file, when you click the “Dist” header that column is hidden. When you click the “Tax Dist” header that column is hidden, etc. When you double click on any header all fields are visible again. This feature not only lets you enter data in either Odometer readings or distances, but you only see the columns that you need to see, thus eliminating the need to ” Tab” through unnecessary columns. It can greatly streamline data entry. Also, if you enter Odometer readings, the program will enter the first three digits for you, then if you enter nothing, it will remove them, if you enter a higher number than before, it will simply enter the difference in the “Dist” and “Tax Dist” fields, but if you enter a lower number, the program will add 1000 miles/kilometers to the odometer reading until it is higher than the previous value, then enter the distance between the new and old odometer reading in the “Dist” and “Tax Dist” field.
You can save a trip profile by selecting one or more rows of data, right click, and select “save to list of trip profiles”. You can name your trip, and it will be added to the list in the yellow box below the Data Entry Grid. This, in combination with the trip list box, can save a lot of time with data entry if you have long trips that are repeated exactly, or almost exactly. (See Trip Profile Demo)
If you use the NY HUT Report, you will use other listings of ‘NEW YORK’ besides the standard. The ‘NEW YORK THRUWAY’ miles are not counted for the HUT because of the toll payments. The ‘NEW YORK UNLADEN’ miles are reported at a lower rate. The ‘NEW YORK BOBTAIL’ miles are reported for Tractors without trailer, also at a lower tax rate. The last two options are only helpful if you use the Gross Weight method. The Gross Weight method can save you a significant amount in taxes if you travel a lot of unladen miles in the state of New York.”
The “Trip List” -box of the Data Entry Dialog allows you to choose a trip profile that can be applied when you right-mouse-click on the Data Entry Grid. You can also add, change the name of a profile, or delete a profile from the list by right-mouse-clicking on the Data Entry Grid. The use of this tool can save you some serious time, by entering up to 100 entries (25 rows of data) at a time with a few mouse clicks. The only thing you have to add is the fuel purchases (See Trip Profile Demo).
The 'Reports'
button of the My Fuel Tax dialog opens the “Create IFTA Reports” Dialog where you create IFTA reports once data entry is complete.
Create your IFTA Report for the desired quarter
Once you made sure you have the IFTA Tax rates and ratecodes for the quarter you want to file for you can complete your IFTA Reporting using the dialog below.
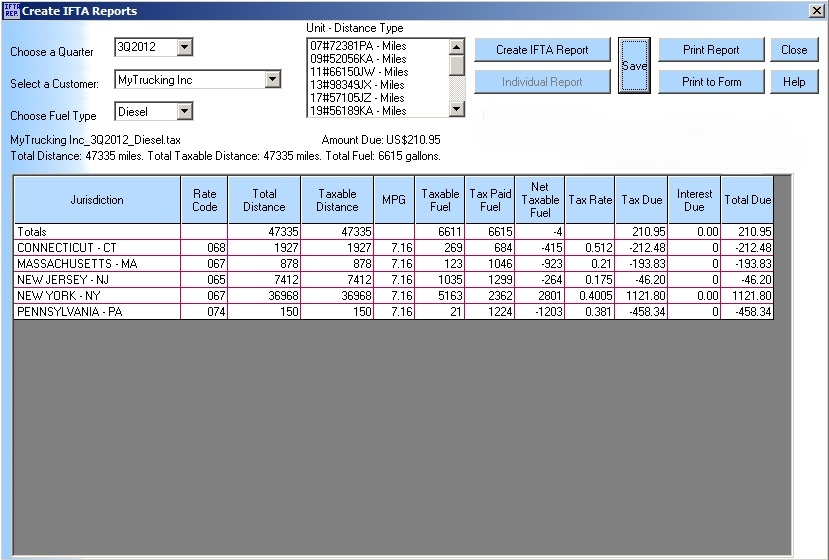
The “Select a Customer” -box – Selects the customer/user, creates a list of available units in the “unit” list box, and activates the “Create IFTA Report” button. “Choose a Quarter” – Select a quarter for which you would like to generate a report. “Choose a Fuel Type” – Select the fuel type for which you will be generating a report. If a tax table for a certain quarter, for the specified fuel type and/or the country for the selected customer profile cannot be found, a message box pops up to tell you to generate one first, then try it again.
The “Create IFTA Report” -button will calculate an IFTA report for all the units associated with this customer. If it is a U.S. filing, the report will be in miles/gallon and will be in U.S. dollars. If it is a Canadian filing, the report will be in kilometers/liter and will be in Canadian dollars.
The “Individual Report” -button – If you select an individual unit in the “Units” list box the “Individual Report” button is activated. This button will create an IFTA report for that individual unit only. This feature allows you to see the impact of an individual unit to your report totals. If you have owner/operators that run under your IFTA account this feature lets you isolate the activities of that individual unit.
The “Print” -button – will print the currently displayed and saved report for your records. The “Save” -button will save the currently displayed report for later use, i.e. printing this report, or optionally incorporating it in a print for a specific jurisdiction. The “Close” and “Help” -button close this dialog, or activate the help screen starting on this page.
The 'Print'
button of the My Fuel Tax dialog opens the “Print” Dialog where you can print your desired reports.
In this dialog you can specify for which user, and for which quarter you want to make printouts. All available reports are listed in the “Select report(s) to print” list box.
You can select multiple reports at once. Files with a “.ftd” extension contain the data for a particular unit for that quarter.
Files with a “.tax” extension contain the results of the IFTA reporting for that fuel type for that customer for that quarter.
Files with a “.ind” extension contain the report for one particular unit for that quarter.
You can choose to either print any of the electronic jurisdiction forms (i.e. California, Connecticut, Florida, New Hampshire, New Jersey, or Utah) using Microsoft Excel, or any other available reports. Feel free to contact us if you want a return for your jurisdiction that does not show up in the jurisdiction list.
The 'Help'
button of the My Fuel Tax dialog activates a Help Tour through each form and functionality contained in this program.